
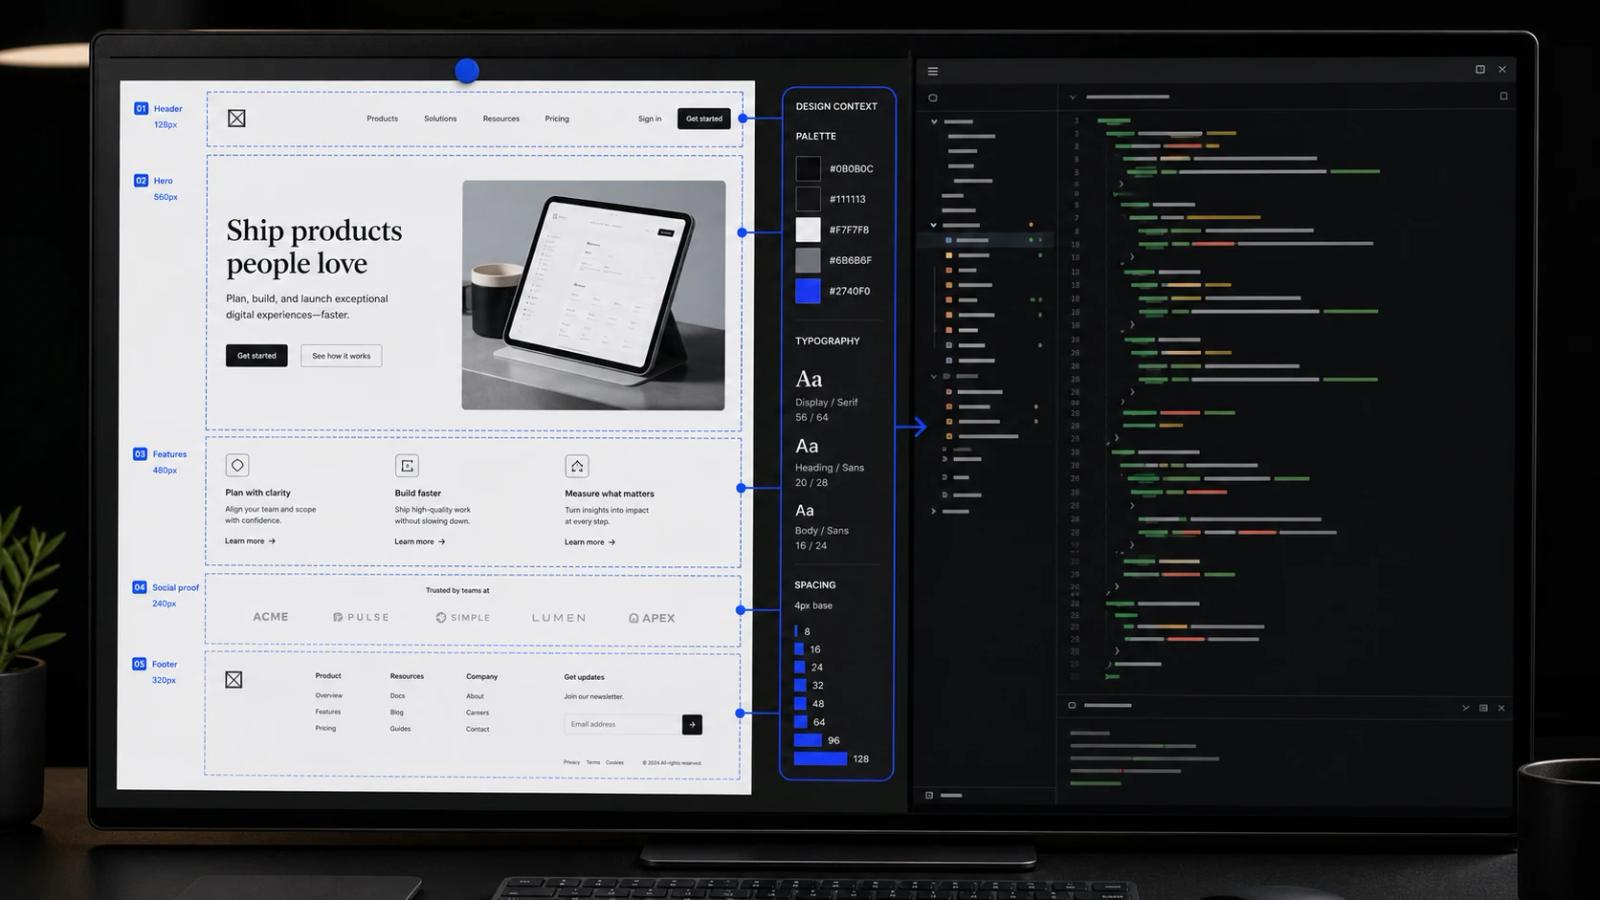
Cursor can understand codebase context, but a screenshot and a repository answer different questions. The repository explains how the product is built. The screenshot explains what the target should look and feel like. A reliable workflow connects both without asking the agent to guess which one has priority.
Create a small reference pack
Store project references in a predictable directory instead of attaching a different image in every chat. Use descriptive filenames and keep the set intentionally small.
docs/design/
  reference-desktop.png
  reference-mobile.png
  reference-navigation-open.png
  design.md
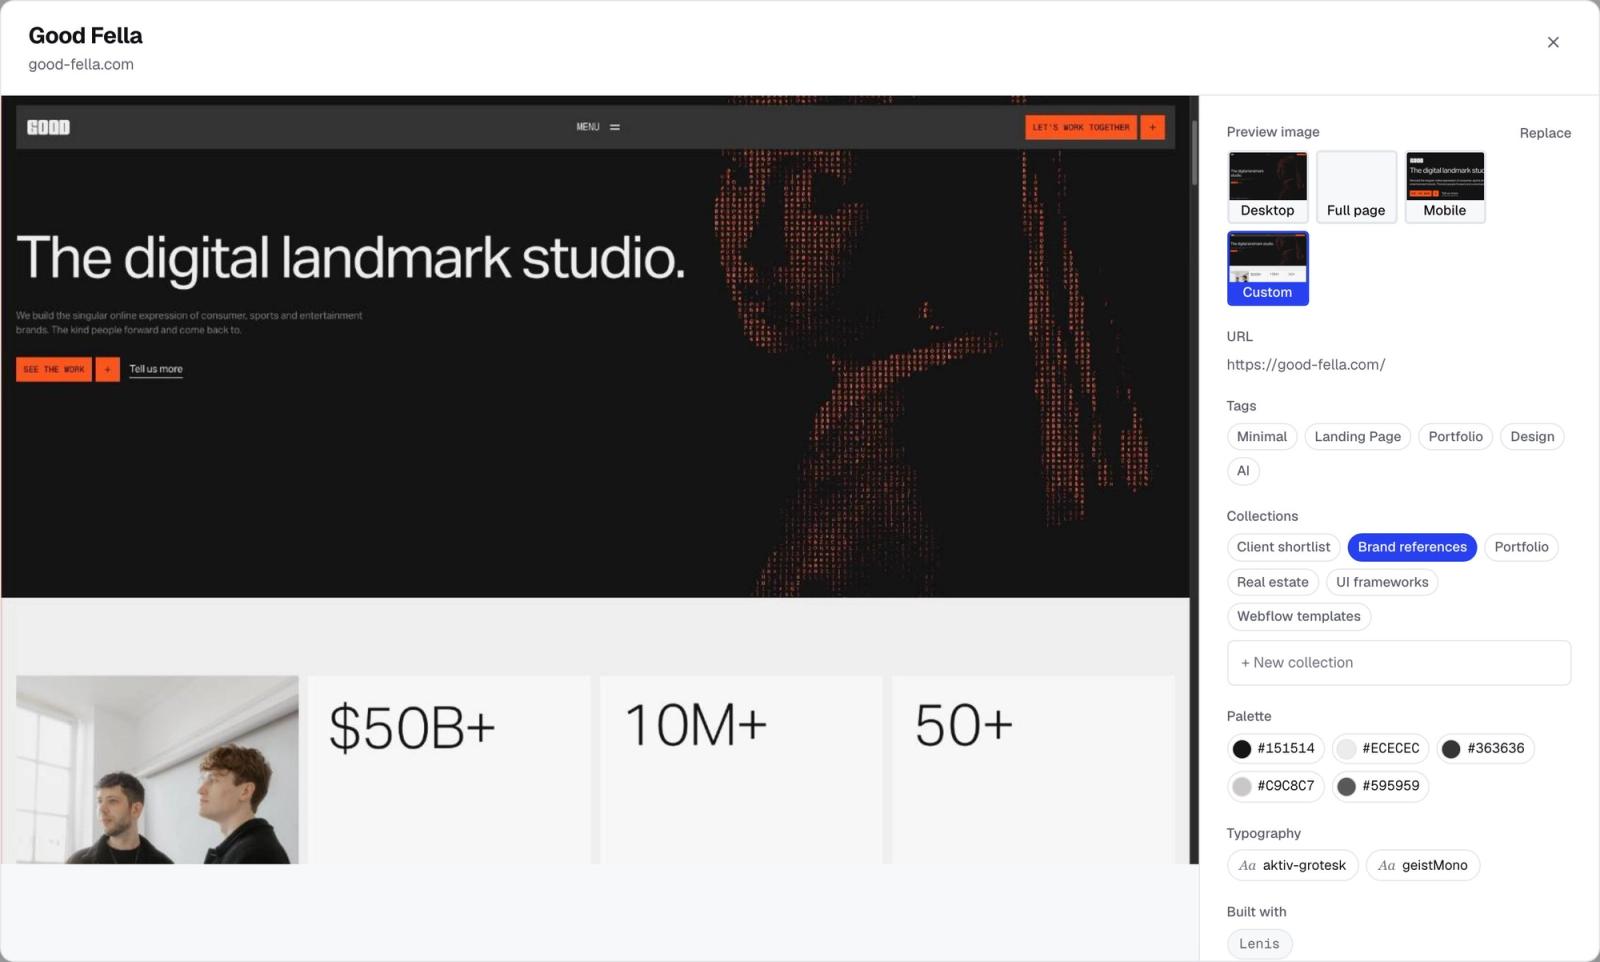
Add the source URL and capture viewport inside design.md. Explain whether each image is a structural reference, a style reference, an interaction reference, or a target that must be matched closely.
Tell Cursor what to preserve
Before discussing aesthetics, define invariants in the existing application: routes, data flow, component APIs, accessibility behavior, analytics, and tests. Visual work becomes risky when an agent interprets redesign as permission to replace functioning architecture.
- Name the page and files in scope.
- List behavior that must remain unchanged.
- State whether new dependencies are allowed.
- Define responsive and accessibility requirements.
- Identify existing design tokens and components to reuse.
Translate the screenshot into persistent rules
Screenshots are useful for one task. Stable design decisions belong in text because they need to survive future prompts. Write down palette roles, typography, spacing, layout constraints, component treatment, imagery, and motion.
Cursor's official Rules documentation explains that project rules provide reusable, version-controlled context in .cursor/rules. Use a rule for durable implementation constraints; use design.md for a human-readable visual brief and reference inventory.
Use a bounded implementation prompt
Inspect the existing page and its shared components before editing.

Use @docs/design/reference-desktop.png and @docs/design/reference-mobile.png as visual references. Read @docs/design/design.md for the extracted design rules.

Implement only the hero and primary navigation in [target files]. Preserve routing, content data, analytics, and existing component APIs.

Match the reference hierarchy, content width, spacing rhythm, typography scale, border treatment, and responsive collapse. Reuse existing tokens where possible; explain any new token before adding it.

Do not copy the reference brand, logo, text, or imagery. Do not change unrelated files.

After implementation, run the existing checks and render screenshots at 1440x900 and 390x844. Compare them with the references and report the remaining visual differences.
Reference the exact code context
Cursor supports file and folder references in Chat and Inline Edit. Point it to the design brief, screenshot files, current page, global styles, and the closest existing component. More context is not always better; relevance is more useful than an entire repository dump.
Implement one visual system before many sections
- Inspect the existing page, tokens, and components.
- Summarize the reference hierarchy and design rules.
- Implement the page shell, navigation, and hero.
- Render at the same viewport as the screenshot.
- Correct type scale, spacing, width, and alignment.
- Expand the approved system to the remaining sections.
Visual verification is part of implementation, not a final polish step. Without screenshots at known viewport sizes, both the developer and the agent are judging from memory.
Keep the source of truth clear
Use the screenshot for visual evidence, design.md for interpreted rules, Cursor Rules for repository-wide constraints, and code tokens for the implemented system. When those sources disagree, update them deliberately rather than adding another corrective prompt.
Moodmark can create the visual side of that context: saved screenshots, source URLs, notes, palette, fonts, and a generated design.md brief ready to place in the repository.
Questions & answers
Can Cursor use a screenshot as a design reference?
Yes. Keep the screenshot in the project or attach it as context, then explain what it should influence and pair it with the relevant code files and written design constraints.
What is the difference between design.md and Cursor Rules?
design.md is a human-readable visual brief and reference inventory. Cursor Rules provide persistent agent instructions scoped to the repository or matching files. They can link to each other.
Why does Cursor produce a generic design from my screenshot?
The screenshot may leave product, responsive, component, or implementation decisions ambiguous. Add explicit visual rules, target files, preserved behavior, and a staged verification process.
How should I verify screenshot-to-code work in Cursor?
Render the implementation at the same desktop and mobile viewport sizes as the references, compare hierarchy and geometry, check interactions, then run accessibility and existing project tests.
